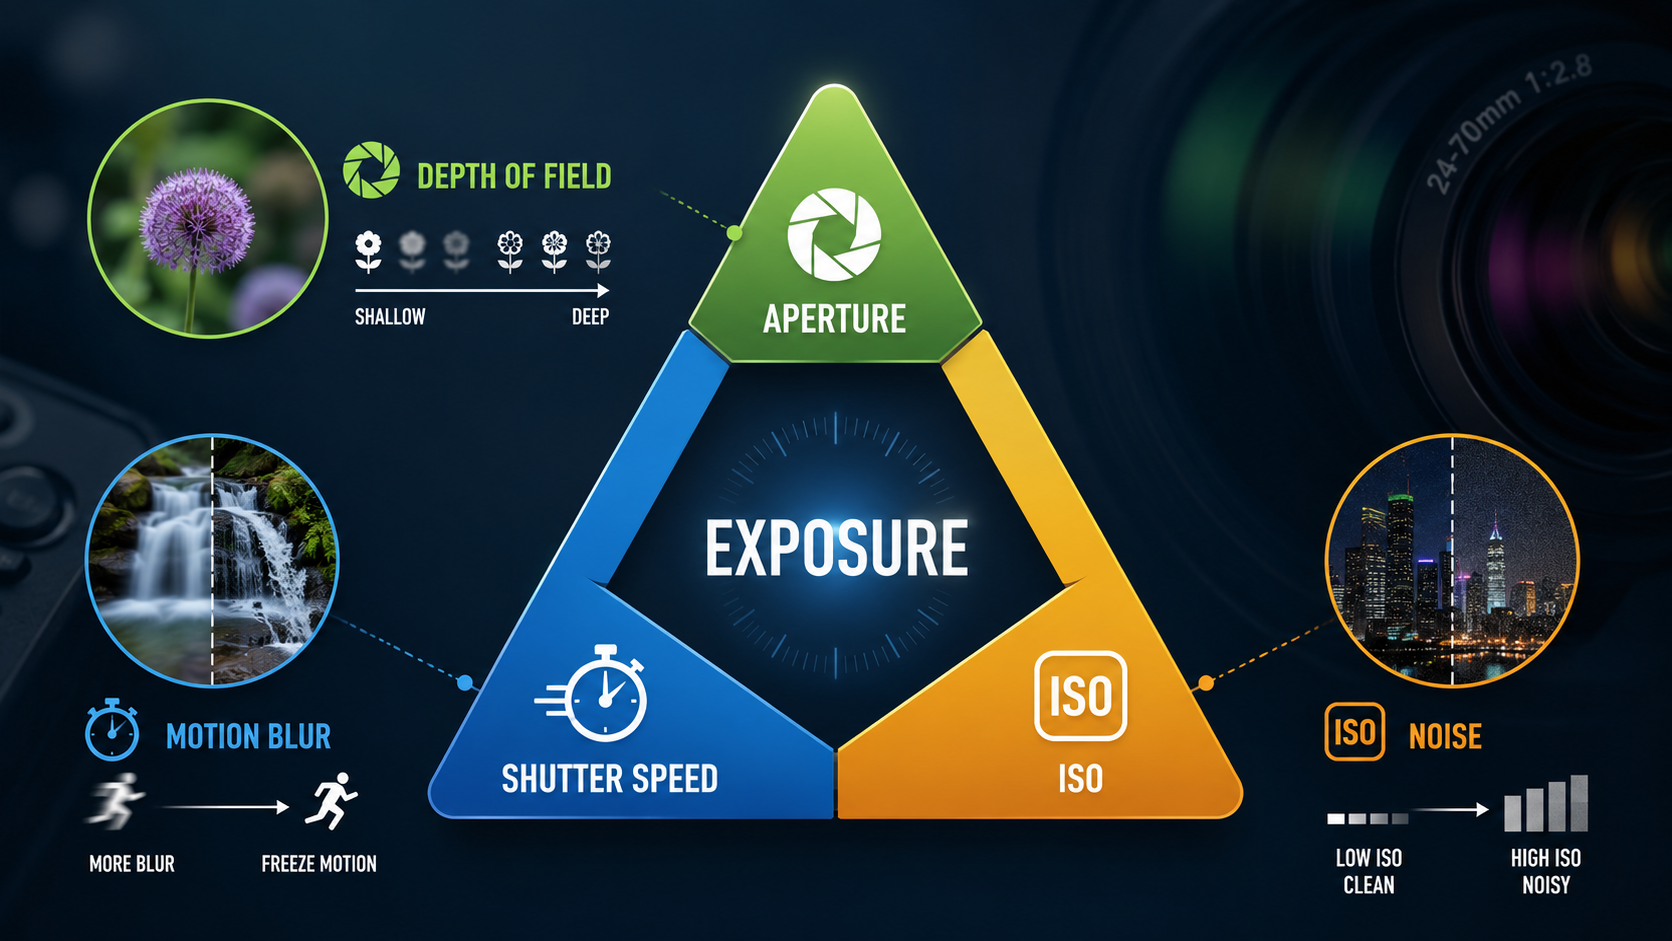
ISO is one of the three main exposure controls used in photography, alongside aperture and shutter speed. On a digital camera, changing the ISO changes how the camera treats the signal captured by the sensor, allowing you to work with different combinations of aperture and shutter speed.
In practical terms, a higher ISO can help you use a faster shutter speed or a smaller aperture when there is not much light available. The trade-off is that higher ISO settings usually make image noise more visible and can reduce image quality.
What does ISO mean in photography?
ISO numbers such as 100, 200, 400, 800 and 1600 are part of a standardised system used to describe photographic exposure response.
A common misconception is that the letters ISO stand for “International Organisation of Standards”. They do not. ISO is the short name used by the International Organization for Standardization.
The important thing for photographers is not what the letters mean, but how the numbers behave when you change them.
Low ISO vs high ISO
Lower ISO settings such as ISO 100 or ISO 200 are usually preferred when you have enough light because they generally produce cleaner images with less visible noise.
Higher ISO settings such as ISO 1600, ISO 3200 or above can be extremely useful in low light or when you need to maintain a fast shutter speed.


Does ISO make the sensor more sensitive?
This is a useful simplification when learning photography, but it is not technically what happens in most digital cameras.
Changing ISO does not normally make the physical sensor itself become more sensitive to light. The amount of light captured is controlled primarily by your aperture, shutter speed and the light in the scene.
Instead, ISO changes how the camera amplifies or interprets the electrical signal produced from the light the sensor captured. This changes the brightness response and the exposure settings you can practically use.

ISO and stops of exposure
Like aperture and shutter speed, ISO is commonly discussed in stops.
Doubling the ISO number represents a one-stop change:
- ISO 100 to ISO 200 = +1 stop.
- ISO 200 to ISO 400 = +1 stop.
- ISO 400 to ISO 800 = +1 stop.
- ISO 800 to ISO 1600 = +1 stop.
Halving the ISO number is a one-stop change in the opposite direction.
This is useful because the same stop-based system is shared with aperture and shutter speed. You can therefore change one setting and compensate with another.
Why does high ISO create more noise?
In low-light situations the camera is often working with a weaker captured signal. Increasing ISO makes that signal more usable, but noise already present in the signal can become more visible too.
At higher ISO settings you may notice:
- more luminance noise or grain-like texture;
- more colour noise;
- less fine detail;
- reduced dynamic range;
- more aggressive in-camera noise reduction in JPEG files.
Modern cameras can perform very well at ISO settings that would once have looked poor, so do not be afraid of increasing ISO when the photograph requires it.
Film ISO and digital ISO
Film photographers will recognise ISO numbers from film stocks such as ISO 100, ISO 200 and ISO 400.

With film, changing ISO generally means loading a different film stock. A roll rated at ISO 400 remains ISO 400 throughout the roll.
Digital photography gives us much more flexibility because the ISO setting can usually be changed from one photograph to the next.

When should you raise ISO?
Raise ISO when maintaining a lower ISO would force you to use settings that compromise the photograph you are trying to make.
Common examples include:
- Sport and action: raising ISO may let you keep a fast shutter speed to freeze movement.
- Indoor photography: there may not be enough available light to use a suitable handheld shutter speed.
- Events: people move, so a higher ISO may be preferable to motion blur.
- Wildlife: maintaining a fast shutter speed may matter more than keeping ISO at its minimum.
- Handheld low light: increasing ISO can help prevent camera shake.
When should you keep ISO low?
Keep ISO low when you already have enough light or when you can achieve the photograph using a tripod or slower shutter speed.
Landscapes photographed from a tripod are a classic example. If nothing important is moving, there may be little reason to raise ISO simply to make the shutter speed faster.
The principle is simple: use the ISO you need, rather than automatically using the lowest number or automatically using a high number.
What is Auto ISO?
Auto ISO allows the camera to choose the ISO automatically while you control some or all of the other exposure settings.
It can be extremely useful. For example, you might select a shutter speed fast enough to photograph moving people and an aperture that gives you the depth of field you want, then allow Auto ISO to respond as the light changes.
Many cameras also allow you to set a maximum Auto ISO value and a minimum shutter speed, giving you more control over how the system behaves.
If you want to use this feature properly rather than simply switching it on, read my Auto ISO and Minimum Shutter Speed guide . It explains maximum ISO limits, minimum shutter speeds and Manual mode with Auto ISO.
Practical ISO settings for beginners
These are starting points rather than strict rules:
- Bright daylight: ISO 100 or 200 is often suitable.
- Overcast daylight: ISO 200 to 800 may be useful depending on shutter speed and aperture.
- Indoor available light: ISO 800 to 3200 may be completely reasonable on a modern camera.
- Night or very low light handheld: ISO 1600, 3200, 6400 or higher may be preferable to a blurred photograph.
- Tripod landscape: use a lower ISO when the subject allows you to use a longer exposure.
Your camera model, subject movement, focal length and intended output all affect how much noise is acceptable.
A practical example: photographing action

Imagine you are photographing a football match and want to use 1/1000 sec to freeze the players.
If your aperture is already as wide as you want it and the image is still too dark at ISO 100, increasing ISO may be the correct decision. A sharp photograph with some visible noise is often more useful than a clean but badly blurred photograph.
A practical example: handheld low light

If you are shooting handheld in low light, you may open your aperture first. If the shutter speed is still too slow to avoid camera shake or subject movement, raising ISO gives you another way to achieve a workable exposure.
ISO, aperture and shutter speed together
ISO makes most sense when you learn it alongside aperture and shutter speed.
Aperture changes the amount of light entering through the lens and affects depth of field. Shutter speed changes the duration of the exposure and affects how movement is recorded.
ISO gives you flexibility when the aperture and shutter speed you need do not produce the brightness you want at your current ISO setting.
Learning all three together allows you to make conscious creative decisions instead of simply accepting whatever settings Auto mode chooses.
ISO explained - the key points
- ISO is one of the three main exposure controls.
- Higher ISO can help in lower light.
- Higher ISO usually makes noise more visible.
- Lower ISO generally gives cleaner image quality.
- Changing ISO does not physically make the digital sensor more sensitive.
- Doubling ISO represents a one-stop change.
- Auto ISO can be extremely useful.
- The lowest ISO is not always the best ISO.
- ISO works alongside aperture and shutter speed to give you the exposure and creative result you need.
Want to get out of Auto mode?
My beginner photography courses teach ISO, aperture, shutter speed, focusing and essential camera controls step by step. You can learn online or choose practical one-to-one photography tuition around Portsmouth.
Explore beginner photography coursesContinue the Exposure Series

Andy Hornby
Photographer, educator and workshop leader with more than twenty-five years of practical photography experience.
Learn with Andy