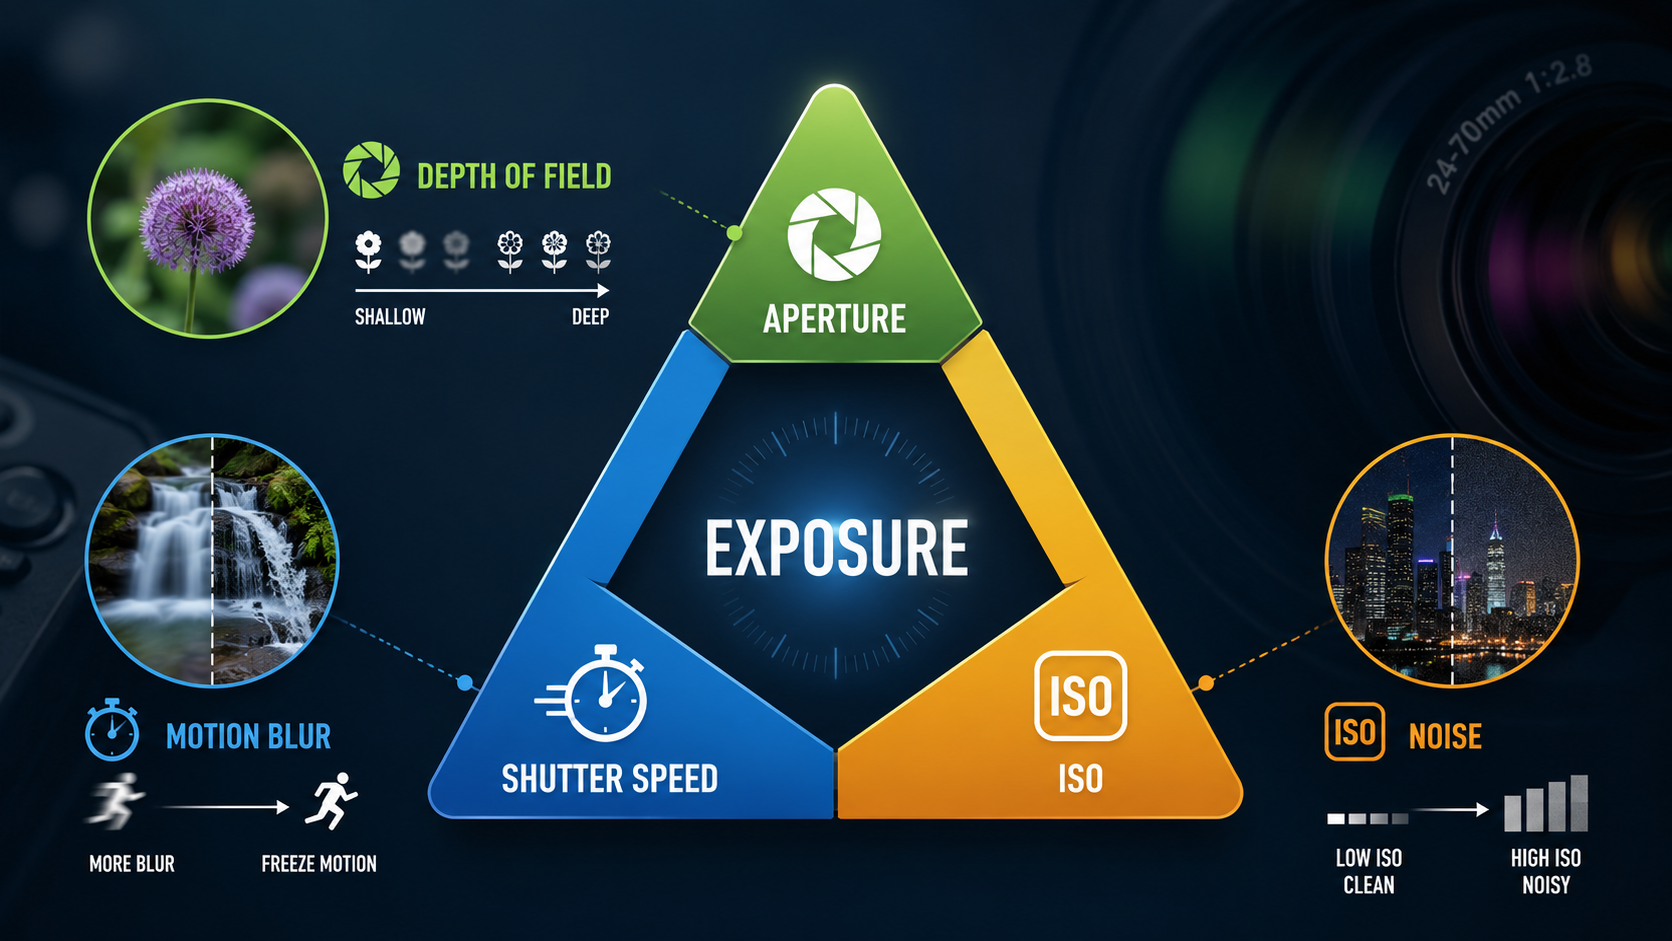
The exposure triangle is a simple way of understanding how aperture, shutter speed and ISO work together when you take a photograph.
All three settings influence the exposure you can achieve, but each one also changes the photograph in a different creative way. Once you understand those differences, getting out of Auto mode becomes much easier.
What is the exposure triangle?
The exposure triangle is a teaching model used to show the relationship between three camera settings:
- Aperture - the size of the opening in the lens.
- Shutter speed - how long the camera records light.
- ISO - how the camera treats the captured signal and the exposure response you work with.
The three controls are linked because changing one can require a change to another if you want to maintain a similar brightness.
Aperture: light and depth of field
Aperture is the adjustable opening inside your lens. A wider aperture lets more light through, while a smaller aperture lets less light through.
Aperture also affects depth of field. A wide aperture such as f/2.8 can help create a blurred background, whereas a smaller aperture such as f/8 or f/11 can help keep more of the scene acceptably sharp.
Read the full guide: Understanding Aperture in Photography .
Shutter speed: time and movement
Shutter speed controls how long the photograph records light.
A fast shutter speed such as 1/1000 sec can freeze movement. A slow shutter speed such as 1/15 sec or several seconds can deliberately record motion blur.
Shutter speed also affects camera shake. If the exposure becomes too slow to handhold reliably, you may need to increase ISO, open the aperture or use a tripod.
Read the full guide: Understanding Shutter Speed in Photography .
ISO: flexibility when the light changes
ISO gives you another way to work with the aperture and shutter speed you need.
If you need a fast shutter speed but the image would otherwise be too dark, increasing ISO may allow you to keep that shutter speed. The trade-off is that higher ISO settings usually make noise more visible.
Read the full guide: Understanding ISO in Photography .
What is a stop in photography?
Aperture, shutter speed and ISO are commonly compared using stops.
A one-stop change represents a doubling or halving of the relevant exposure value.
- Changing shutter speed from 1/250 sec to 1/125 sec gives one stop more exposure time.
- Changing ISO from 100 to 200 represents a one-stop increase.
- Changing aperture from f/5.6 to f/4 opens the aperture by one full stop.
Stops give all three settings a common language, which makes it easier to understand how one setting can compensate for another.
A simple exposure triangle example
Imagine you have a photograph that looks correct at:
- f/4
- 1/250 sec
- ISO 200
You now decide that you want more depth of field, so you change the aperture from f/4 to f/5.6. That reduces the light passing through the lens by one stop.
To maintain a similar overall brightness, you could compensate by:
- slowing the shutter from 1/250 sec to 1/125 sec; or
- increasing ISO from 200 to 400.
Both compensate by one stop, but they create different side effects. The slower shutter may show more movement, while the higher ISO may show more noise.
That creative decision is the real value of understanding the exposure triangle.
What setting should I change first?
There is no universal order. Start with the setting that matters most to the photograph.
If depth of field matters most
Choose your aperture first.
This is common for portraits, landscapes and close-up photography, where how much of the scene appears sharp is an important creative choice.
If movement matters most
Choose your shutter speed first.
This is common for sport, wildlife, children, vehicles and any subject where you need to freeze movement or deliberately show motion blur.
Then use ISO when needed
Once you have chosen the aperture and shutter speed required for the photograph, ISO gives you additional flexibility when the available light does not suit those settings.
Portrait example
For a portrait you may want a blurred background, so aperture is likely to be your first creative decision.
You might begin around:
- Aperture: f/2.8
- Shutter speed: 1/250 sec
- ISO: adjust for the available light
If the light drops, increasing ISO may be preferable to allowing the shutter speed to become so slow that subject movement causes blur.
Sport and action example
For sport, freezing movement is often the priority, so shutter speed becomes the first major decision.
You might begin around:
- Shutter speed: 1/1000 sec
- Aperture: as wide as appropriate
- ISO: raise as needed
A photograph with some noise is usually more useful than a clean photograph where the subject is badly blurred because the shutter speed was too slow.
Landscape example
In landscape photography you may want greater depth of field and have the option of using a tripod.
A starting point could be:
- Aperture: f/8
- ISO: 100
- Shutter speed: whatever is needed for the exposure, assuming subject movement allows it
Because the camera is supported, a slower shutter speed may not be a problem.
Low-light handheld example
In low light without a tripod, you need to prevent both subject movement and camera shake.
You might:
- open the aperture;
- choose a safe handheld shutter speed;
- raise ISO until the exposure works.
This is a good example of why insisting on ISO 100 all the time can actually make your photographs worse.
Manual mode vs Aperture Priority vs Shutter Priority
You do not have to use full Manual mode to understand exposure.
Aperture Priority
You choose the aperture and the camera selects an appropriate shutter speed. This is useful when depth of field is the priority.
Shutter Priority
You choose the shutter speed and the camera selects the aperture. This is useful when controlling movement is the priority.
Manual mode
You choose aperture and shutter speed yourself. You can also choose ISO manually or use Auto ISO if your camera supports it.
The best mode is the one that gives you the control you need for the photograph you are making.
Beginner exposure triangle cheat sheet
| Setting | More light / brighter response | Less light / darker response | Creative effect |
|---|---|---|---|
| Aperture | Wider aperture, smaller f-number | Smaller aperture, larger f-number | Changes depth of field |
| Shutter speed | Slower shutter | Faster shutter | Changes how movement is recorded |
| ISO | Higher ISO | Lower ISO | Higher ISO can make noise more visible |
The exposure triangle - key points
- Aperture affects exposure and depth of field.
- Shutter speed affects exposure time and movement.
- ISO provides flexibility but can affect image quality.
- All three settings can be compared using stops.
- Changing one setting can require compensation elsewhere.
- Choose the setting that controls the creative effect you care about first.
- Do not be afraid to raise ISO when a photograph needs it.
- Understanding exposure matters more than simply memorising camera settings.
Want to learn this properly with your own camera?
My beginner photography courses cover aperture, shutter speed, ISO, focusing and the essential camera controls step by step. You can learn online or through practical one-to-one tuition around Portsmouth.
Explore beginner photography coursesLearn each exposure setting in more detail
Aperture
Learn f-stops, depth of field, lens sharpness and how aperture controls light.
Read Aperture GuideShutter Speed
Learn how to freeze movement, create motion blur and avoid camera shake.
Read Shutter Speed Guide
Andy Hornby
Photographer, educator and workshop leader with more than twenty-five years of practical photography experience.
Learn with Andy

