Exposure compensation is one of the quickest ways to take control of a photograph when your camera makes the image too bright or too dark.
Instead of changing every exposure setting manually, you simply tell the camera: make this photograph brighter or make this photograph darker.
What is exposure compensation?
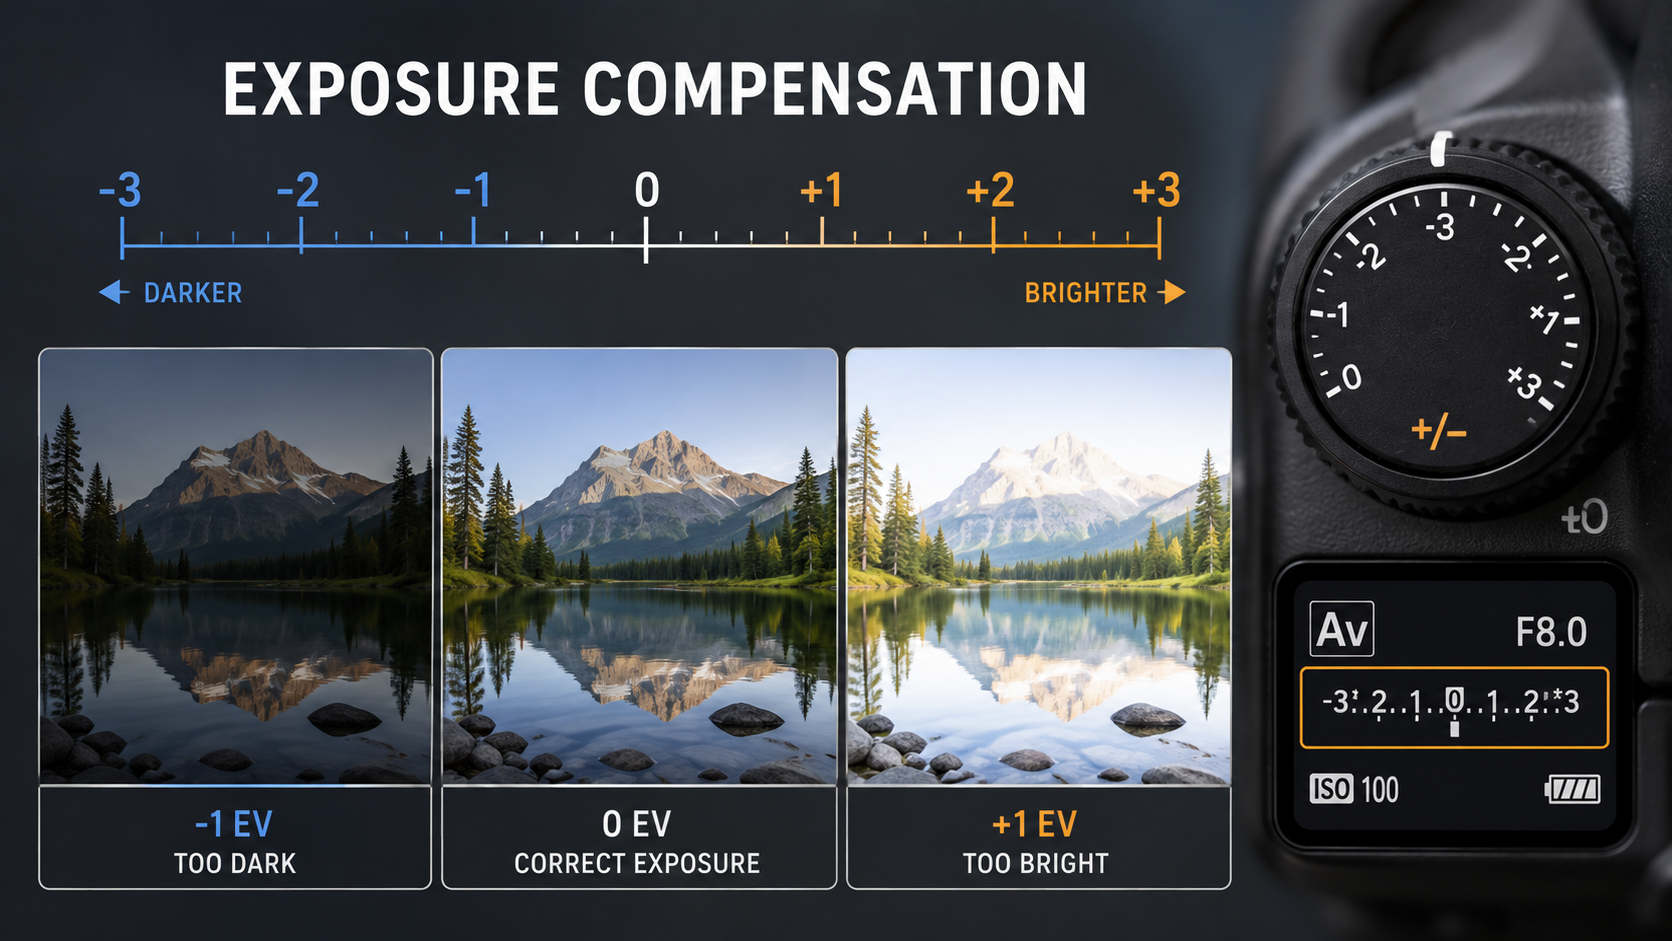
Exposure compensation lets you override the brightness level chosen by the camera's light meter while still using an automatic or semi-automatic exposure mode.
It is normally shown using a scale such as:
-3 -2 -1 0 +1 +2 +3
A setting of 0 means you are accepting the camera's suggested exposure.
- +1 EV tells the camera to make the image one stop brighter.
- -1 EV tells the camera to make the image one stop darker.
Smaller adjustments such as +0.3, +0.7, -0.3 or -0.7 EV are also common.
What does EV mean?
EV stands for Exposure Value.
When using exposure compensation, photographers often use EV as a convenient way of describing how much brighter or darker they want the camera's exposure to become.
One full stop represents a doubling or halving of the amount of light represented in the exposure.
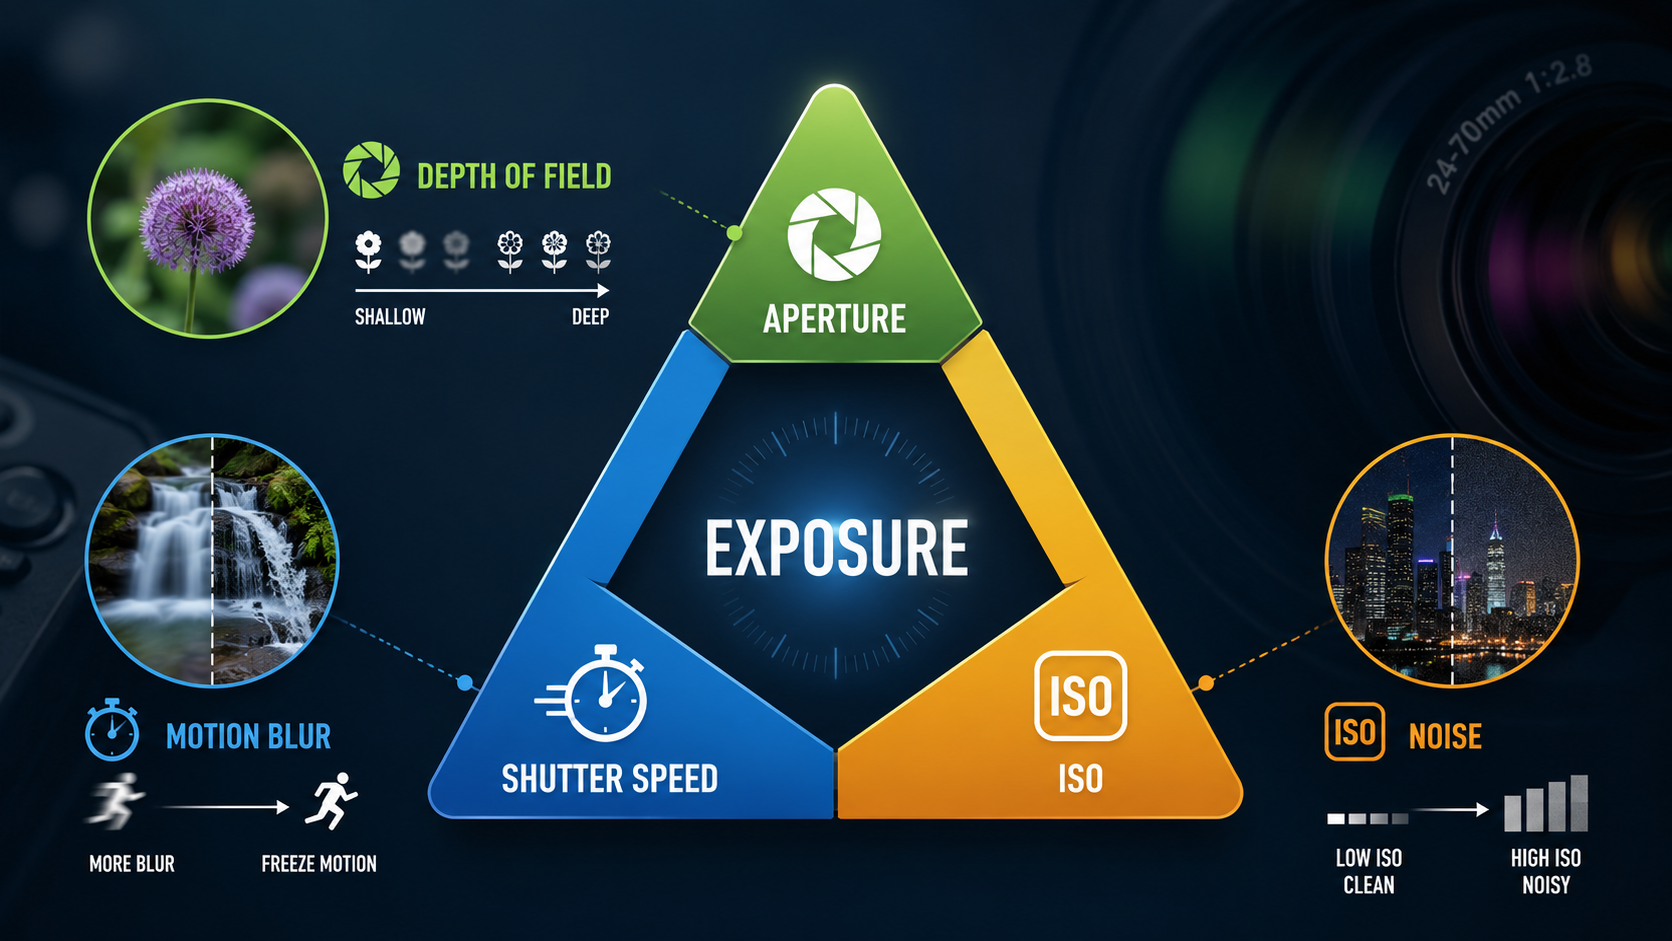
If you want to understand stops in more detail, read my beginner guide to the exposure triangle .
Why does the camera sometimes get exposure wrong?
Your camera does not actually know how bright the finished photograph should look.
Its meter measures light and makes a judgement based on the scene. In many situations that judgement works extremely well, but some subjects can confuse it.
Very bright or very dark scenes are common examples.
Bright subjects can become too dark
Imagine photographing:
- snow;
- a white wedding dress;
- a pale beach;
- a bright wall;
- a strongly backlit scene.
The camera may decide there is too much brightness and reduce the exposure, leaving the photograph darker than you intended.
Adding positive exposure compensation, such as +0.7 EV or +1 EV, may produce a result closer to what you actually saw.
Dark subjects can become too bright
A dark scene can create the opposite problem.
Examples include:
- black clothing;
- a dark stage;
- night scenes;
- dark interiors;
- a subject against a predominantly black background.
The meter may try to brighten the scene more than you want. Negative exposure compensation can correct this.
Positive vs negative exposure compensation
| Setting | What it does | Typical reason |
|---|---|---|
| +1 EV | Makes the exposure one stop brighter | Camera is making the photograph too dark |
| +0.3 EV | Makes a small increase in brightness | Minor correction |
| 0 EV | Uses the camera's suggested exposure | No correction required |
| -0.3 EV | Makes a small reduction in brightness | Minor highlight protection or correction |
| -1 EV | Makes the exposure one stop darker | Camera is making the photograph too bright |
How exposure compensation works in Aperture Priority
In Aperture Priority mode , you choose the aperture and the camera normally chooses the shutter speed.
If you add positive exposure compensation, the camera will normally choose a slower shutter speed to make the image brighter.
If you add negative exposure compensation, it will normally choose a faster shutter speed to make the image darker.
This makes exposure compensation especially useful in Aperture Priority because you can keep the depth of field you want while quickly correcting brightness.
How exposure compensation works in Shutter Priority
In Shutter Priority, you choose the shutter speed and the camera normally chooses the aperture.
Exposure compensation therefore changes the aperture selected by the camera, provided the lens has enough aperture range available.
If the camera reaches the widest or narrowest aperture available, it may no longer be able to apply the full compensation you asked for.
Exposure compensation with Auto ISO
On many modern cameras, exposure compensation can also influence Auto ISO.
For example, in Manual mode with Auto ISO, you may choose the aperture and shutter speed yourself while the camera adjusts ISO. Exposure compensation can then tell the camera to target a brighter or darker result.
Behaviour varies between camera models, so it is worth checking your camera manual.
My ISO guide explains how ISO fits into exposure decisions.
Does exposure compensation work in Manual mode?
If you are using completely manual exposure with a fixed aperture, fixed shutter speed and fixed ISO, changing exposure compensation usually does not directly change the exposure because you have already taken control of all three settings.
Instead, you simply change aperture, shutter speed or ISO yourself.
Manual mode with Auto ISO can behave differently, as the camera is still controlling ISO.
When should you use exposure compensation?
Exposure compensation is useful whenever the camera's suggested brightness does not match the photograph you want.
Common examples include:
- snow and bright beaches;
- backlit portraits;
- white clothing;
- dark stages and concerts;
- sunsets;
- silhouettes;
- high-key photography;
- low-key photography;
- protecting important highlights.
Example: a backlit portrait
Imagine photographing somebody standing in front of a bright window.
The camera sees a large amount of bright light and may reduce the exposure. The background looks reasonable, but the person's face is too dark.
In Aperture Priority, you could try something like +1 EV.
The camera increases the exposure and the person's face becomes brighter.
The background may become brighter too, which is why exposure choices are always a balance between different parts of the scene.
Example: protecting a bright sky
Imagine a landscape with a bright sunset.
If the camera produces an image that is too bright and important highlight detail is being lost, you might try -0.3 EV, -0.7 EV or -1 EV.
The exact amount depends on the scene and the result you want.
I also have a separate guide on exposing for the highlights .
How much exposure compensation should you use?
There is no single correct number.
A useful approach is to start with a small adjustment such as +0.3 or -0.3 EV, take another photograph and review the result.
If the correction is not enough, increase it gradually.
Digital cameras make this process particularly easy because you can check the image, histogram and highlight warnings immediately.
Exposure compensation and the histogram
The histogram can help you judge how brightness is distributed across the photograph.
Moving exposure compensation towards the positive side will generally move more tonal information towards the brighter side of the histogram.
Negative compensation generally moves it towards the darker side.
But the aim is not to force every histogram into the middle. A photograph of snow should naturally contain lots of bright tones, while a night photograph may naturally contain lots of dark tones.
If you already have exactly the exposure you want and simply need it to remain unchanged while you recompose, that is a different job. My Exposure Lock (AE-L) guide explains when locking the meter reading is more useful than adding positive or negative compensation.
Exposure compensation vs changing ISO
Exposure compensation is an instruction about the result you want. ISO is one of the settings the camera may use to achieve that result.
They are not the same thing.
Depending on your exposure mode, the camera may respond to exposure compensation by changing shutter speed, aperture, ISO, or a combination allowed by your current settings.
Exposure compensation vs Manual mode
Exposure compensation is usually fastest when you are using a semi-automatic mode and simply want the camera's exposure to be a little brighter or darker.
Manual mode is more useful when you want the exposure settings to remain fixed and predictable.
Neither method is automatically better. They solve different problems.
A simple beginner workflow
- Choose an appropriate camera mode.
- Take a photograph.
- Look at the image and important highlights.
- If the image is too dark, try positive exposure compensation.
- If the image is too bright, try negative exposure compensation.
- Take another photograph and compare.
- Return compensation to zero when you no longer need it.
Exposure compensation - key points
- Positive exposure compensation makes the image brighter.
- Negative exposure compensation makes the image darker.
- 0 EV means no compensation.
- +1 EV is one stop brighter.
- -1 EV is one stop darker.
- It is especially useful in Aperture Priority and Shutter Priority.
- Bright and dark scenes can fool the camera's meter.
- Exposure compensation does not replace understanding exposure; it gives you a quick way to influence it.
Want to understand your camera instead of guessing?
My beginner photography courses cover aperture, shutter speed, ISO, camera modes and practical exposure control step by step. You can learn online or through practical one-to-one tuition around Portsmouth.
Explore beginner photography coursesContinue learning exposure

Andy Hornby
Photographer, educator and workshop leader with more than twenty-five years of practical photography experience.
Learn with Andy